VIDEO TUTORIAL
Carrara White Marble Effect Video Guide
What is this video about?
This video tutorial is designed to accompany our Carrara White Marble Countertop Kit and provides full details on the process, colours, and blending techniques used to create a stunning, convincing white marble resin countertop/worktop using the kit.
This video only covers the colours and blending techniques for the Carrara White Marble effect and is intended to be watched alongside our Complete Resin Countertop Tutorial for a complete understanding of the resin countertop process.
As well as the main countertop tutorial, this video is also accompanied by a downloadable colour card which includes full details for the weights and measurements of resin and pigment throughout the process.
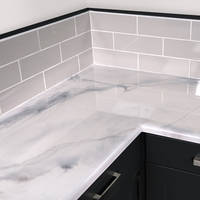
How to Create a Convincing White Marble Effect
The key to creating a truly convincing white marble effect lies in using a slightly sparkly, translucent white basemix which is layered over the top of subtle grey shades, allowing them to show through from underneath and creating a real sense of depth. Finer details of darker grey and sparkling bronze echo the fissures and veins of real marble and complete the look.
Before starting, you should familiarise yourself with the instructions in the main countertop tutorial and prepare your work area and countertops according to those instructions.
The Primer Coat
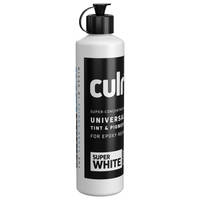
- Create the primer coat by adding 10% Super White Colour Pigment to a smaller batch of the GlassCast 3 resin.
- Apply the white primer coat to your surfaces to block out any colours or patterns from underneath and create the white background for the white marble effect.
- Allow the primer coat to cure before 'keying' it to ensure a good bond and adding a resin barrier to the front edge.
Mixing the Colours for the Main Pour
- For the main pour, begin by creating the base mix by adding Arctic Pearl SHIMR Powder and a small amount of Super White CULR pigment to a large batch of the GlassCast 3 resin.
- Divide off small quantities of the base mix into 3 separate mixing cups to make the tints and accents.
- In two of the cups, create a lighter and a darker grey shade by adding small amounts of Graphite SHIMR powder 'by eye'.
- In the last cup, add a small amount of Bronze SHIMR powder, by eye, to create a rich bronze colour.
Pouring, Layering and Blending the Colours
Within 30 minutes of mixing
After adding the hardener to the resin, you have 30 mins to get the resin out of the pots and onto the countertops.
- Begin by pouring about 1/3 of the base mix out onto your countertops and spreading it out over the whole surface. This creates a background into which we can blend our grey tints.
- Drizzle small bands of the grey tints and bronze accent across the countertop, trying to create shapes and lines evocative of veins and fissures in natural stone.
- Use a paintbrush to lightly blend these tints into the surrounding base mix.
- Use a hair dryer (on a cold setting) to disturb and blend these tints, breaking up their lines into more irregular shapes. Don't worry that these tints will look quite strong and distinct at this stage.
- Now pour the majority of the base mix all over the countertops, on top of these tints. Use a notched spreader to spread the resin around but try to keep the action light, you don't want to drag the underlying tints around to much.
- Use a paintbrush again to blend the tints some more so that they have soft edges and blend gently into the white background.
- Next, use a mixing stick to drizzle very thin veins of the grey tints and bronze accent; these veins should loosely follow the softer lines of the underlying tints.
Within 1 hour of mixing the resin
With almost all the resin on the countertops, you now have a remaining 30 mins to blend and perfect the appearance.
- Use a hair dryer to break up the thin lines of the veins into more natural, irregular fractures.
- If you feel any areas need slightly bolder accents you can dab or drizzle small amounts of leftover grey or bronze.
- If you have any areas where the tints are too strong, you can use leftover base mix to soften them.
- Continue with the paintbrush and hair dryer until you're happy with the look but aim to finish with the hairdryer in order to break up any obvious brush marks.
- You must stop working within 1 hour of first mixing the resin.
DISCUSSION (1)
Please share any questions or comments you may have about this video tutorial.
Existing silicone on a worktop does not need to be removed when preparing a worktop. Old silicone like that does not cause any issues with the resin. The only time we would be cautious is if it is fresh silicone. If making new worktops, do not use silicone until the GlassCast project is complete, at which time you can seal any gap between the tiles and resin surface, much like you would with a normal worktop.
LEAVE A COMMENT OR QUESTION
Downloads (1)
| Resin Countertop Handbook |
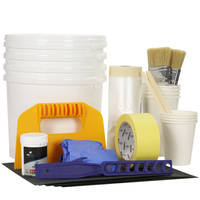
USED IN THIS PROJECT
Want to buy the same materials and equipment used in this tutorial? We've got you!
Please find below a list of all the materials and equipment used in this project, all available to buy right here on the GlassCast website. Shown alongside each product is the approximate quantity used in the tutorial video, to the nearest full pack.
ANCILLARIES
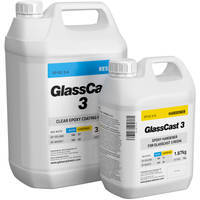
RESIN & PIGMENTS
COUNTERTOP KITS
DISCUSSION (1)
Please share any questions or comments you may have about this video tutorial.
Existing silicone on a worktop does not need to be removed when preparing a worktop. Old silicone like that does not cause any issues with the resin. The only time we would be cautious is if it is fresh silicone. If making new worktops, do not use silicone until the GlassCast project is complete, at which time you can seal any gap between the tiles and resin surface, much like you would with a normal worktop.